
 myCSUSM


Creating and Grading a PoodLL VIDEO Assignment
Why Do This?
You can create an assignment or, other tools that have the option, that requires students to submit a video recording, using a camera and microphone connected or built into their computer or laptops. The PoodLL video cloud recorder option within the Assignment tool will create an mp4 video that you’ll be able to view from a player embedded on the assignment grading and submission pages. You can also opt to record instructor audio feedback for your students, in addition to the other available feedback types. Recordings get less reliable as they get longer, so best not to venture over 2 or 3 minutes.
Setup/Playback Requirements
• Use a recent version of Firefox or Chrome (Safari on a MAC does not work). This
applies to student recordings as well.
• If using an external microphone and/or camera, connect these to your computer before proceeding.
• Check/ adjust your computers settings to ensure the attached devices are set as
the default for recording.
***You may have noticed that instead of the "online PoodLL" setting it is now called "Cloud PoodLL" .
Sections of this document:
Create a video Cloud recording assignment
Grade a video Cloud recording assignment
Record Audio Cloud Instructor feedback for the submissions
Create a Video Recording Assignment
1. On your course homepage, click the Add an activity or resource link at the bottom of the topic where you wish to add the Assignment.
2. Select Assignment from the list of Activities.
3. Click the Add button.
4. Complete the General and Availability sections as you would for any assignment. In your assignment description, you may
want to refer students to the PoodLL Cloud assignment video section of the student
guide>Media tools>Using the Cloud PoodLL video recorder.
Submission Types
5. Submission types: select Cloud PoodLL. You can also select File submissions, but we don't recommend selecting online text, as students may use the text field to record their video, which will not display as submitted during grading.
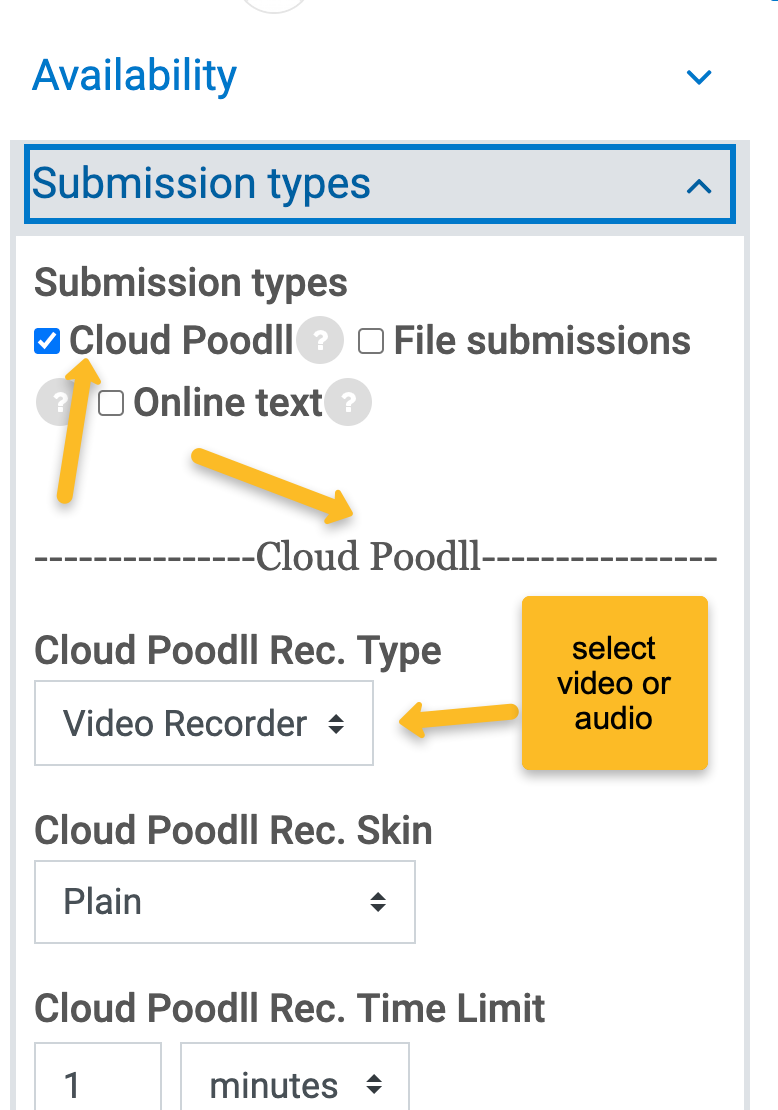
6. The other options will be grayed out as they pertain to regular paper submissions.
7. Scroll to the ------Cloud Poodll ------ settings area within the submission box.
8. Choose from the Cloud Poodll Rec. Type - VideoRecorder
9. Then choose the skil or look you would like your video to have in the Cloud PoodLL
Rec. Skin. For your first time we recommend you just stay with plain until you have had the chance to play ot practice using the other skins/themes.
10. Cloud PoodLL Rec. Time Limit: set the maximum time for the students recorded response, by selecting minutes or
seconds from the dropdown, and entering a number in the field to the left. Important: Video recordings should be 3 minutes or less.
11. Then there are a set of more settings to choose from: 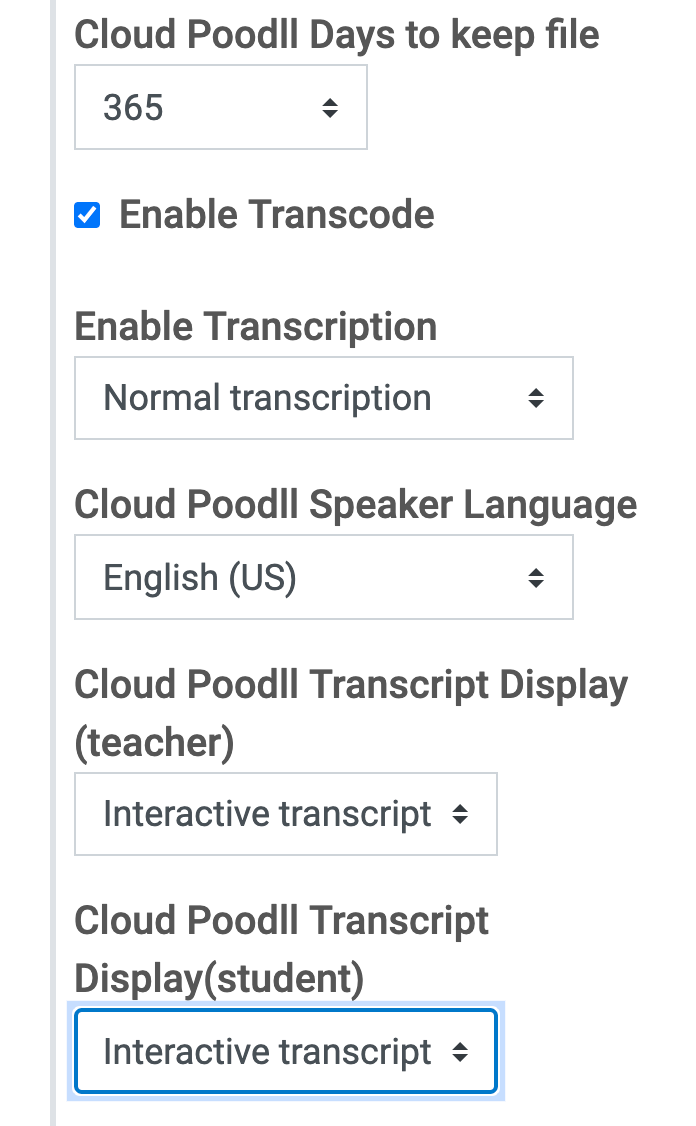
12. Cloud PoodLL Days to keep file - use default 365 days unless you want to change
it.
13. Enable Transcode: check box. This will allow you to set the captioning and accessiblility
options wich are required.
14. Enable Transcription: Leave on Normal.
15. Cloud PoodLL Speaker Language: set to English for the transcript purposes.
16. Cloud PoodLL transcript display (teacher): Select Interactive transcript so the words will be synced with the vdieo.
17. Cloud PoodLL transcript display (student): Choose Interactive Transcript so students can see the captioning in real time along with the video.
Instructor Feedback types
When grading, you have the option to provide the student with a video recording of
your feedback in addition to, or in place of the other options. Note: you may select
more than one option.
8. Feedback types: select Cloud PoodLL.
9. PoodLL Recorder Type: select Cloud PoodLL Audio or Video recorder.
10. Recorder Skin: Set to Plain or Burnt Rose until you are familiar with the tool.
11. Recording time limit: Keep below 3 minutes.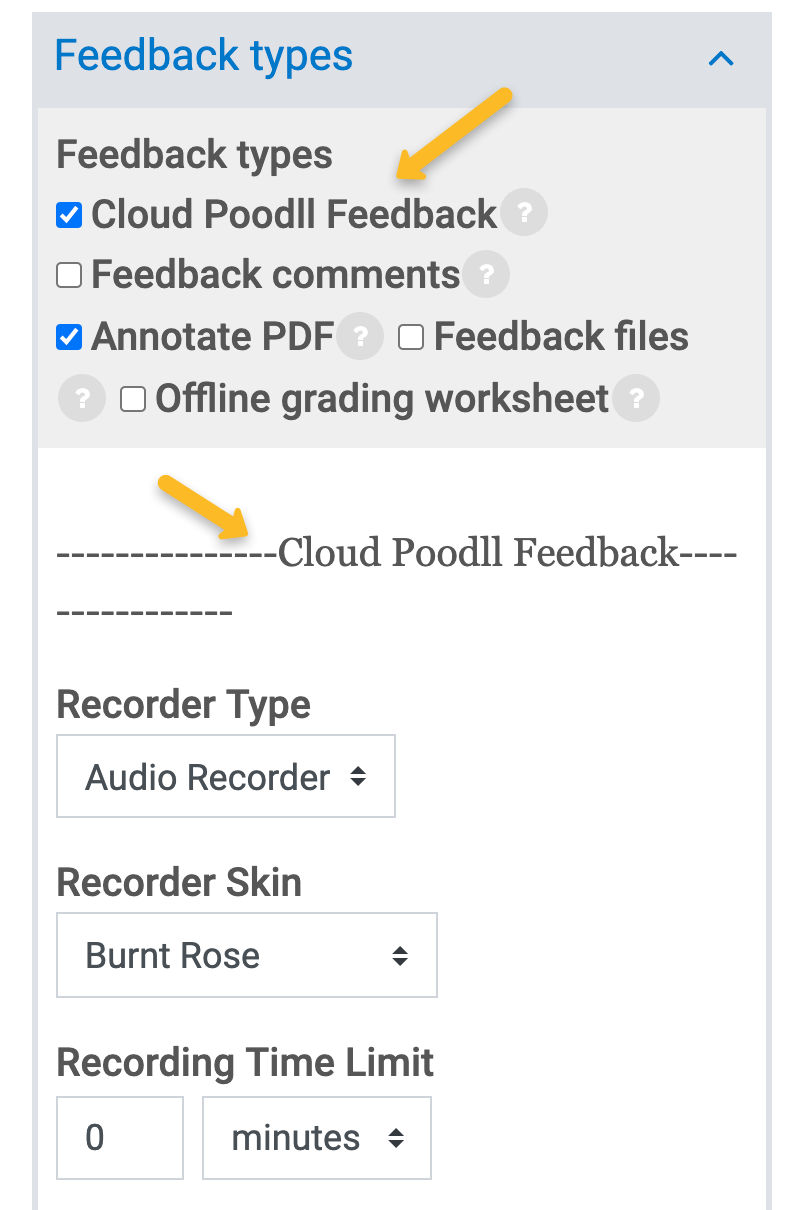
12. Then choose from other selections:
8. Complete the remaining sections as you would for any other assignment.
9. Click Save and return to course.
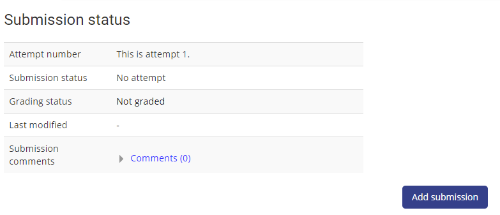
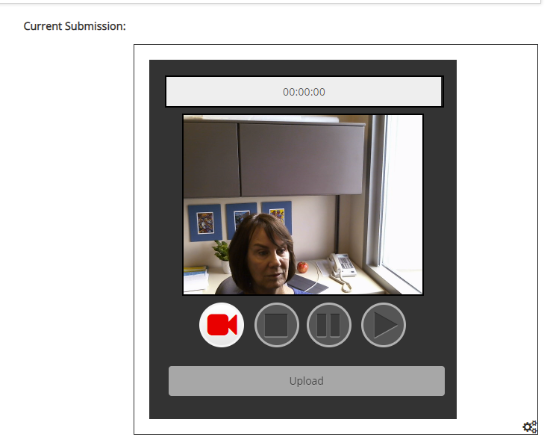
What the Student Sees
Add submission button
Video recording interface
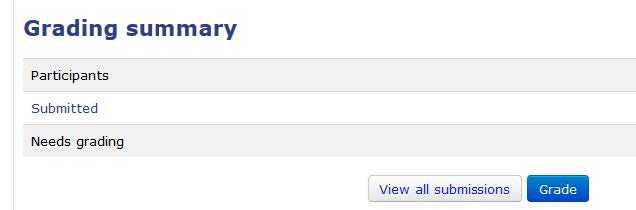
Grading a Video or Audio Recording Assignment
1. Click the assignment name on your course homepage.
2. On the Grading summary, click the Grade button.
3. To navigate between submissions, use the next arrow or the change user dropdown at the top right.
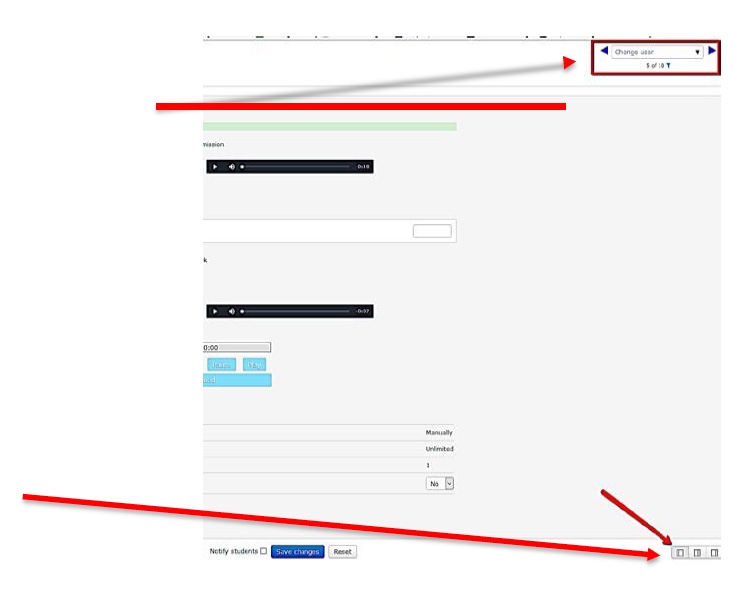
4. If the submission type is set only to audio, click the first icon at the bottom right of the screen, to expand the right pane.
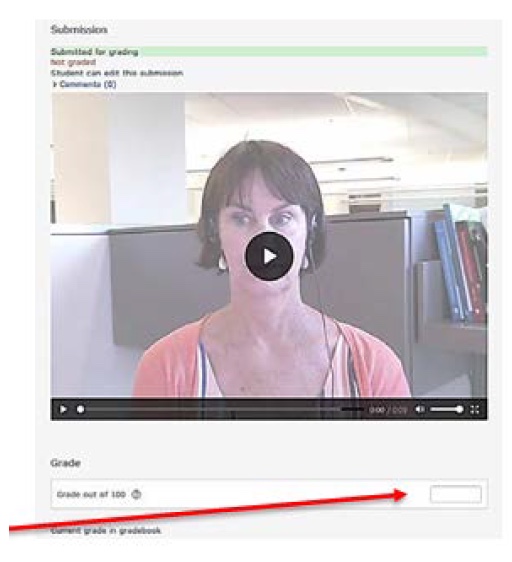
5. Play the student’s recording.
6. Enter a grade to the right in the open box.
Recording Your Feedback
The first time you record, you may see a message asking you to click to allow Cougar
Courses to access your microphone. If the recorder doesn’t appear, check for a popup
window, or your computer notifying you that it has blocked a popup you’ll need to
enable.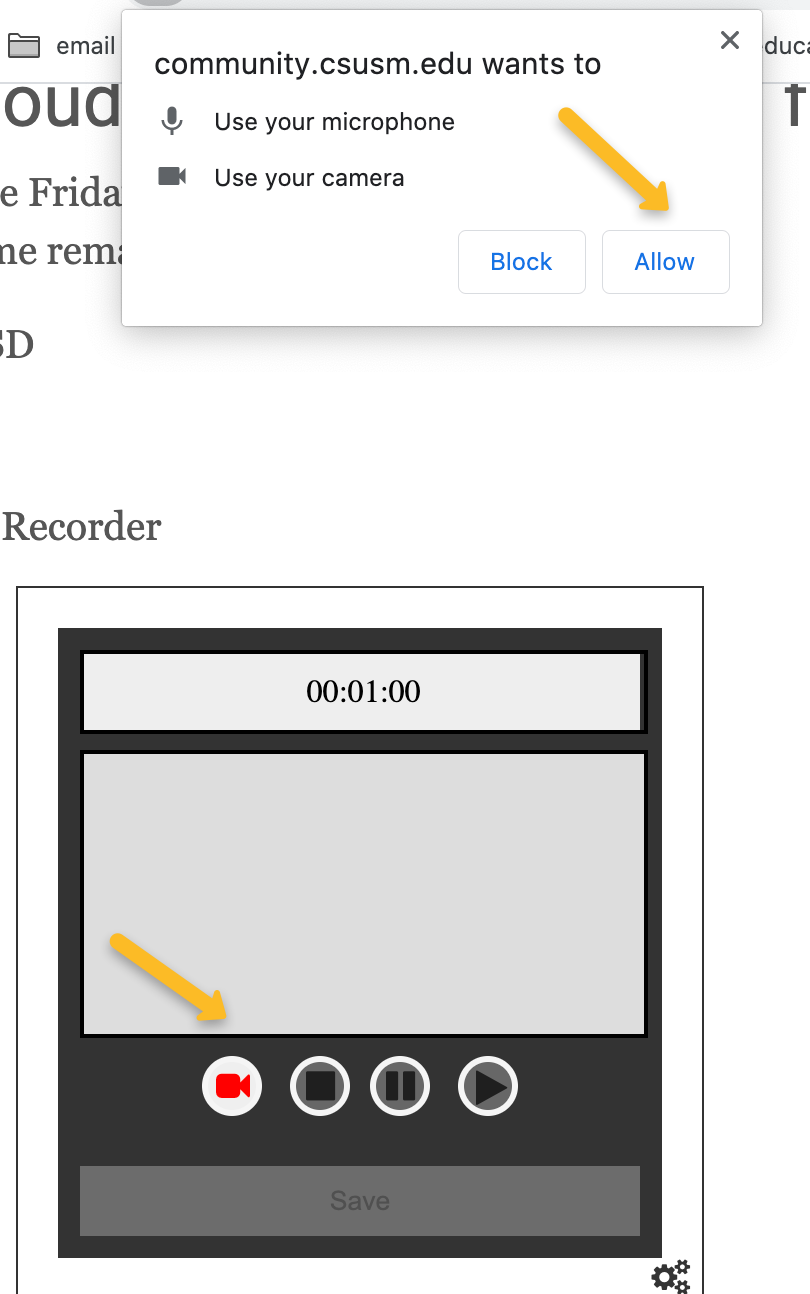
Click Record to begin your recording. Wait until the camera displays your image before beginning your feedback.
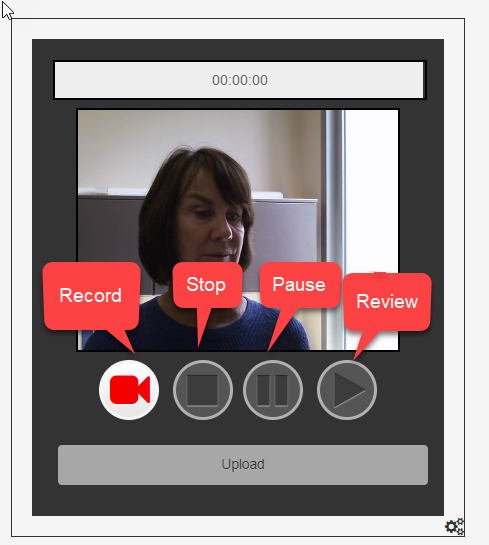
- 7. Click Stop when finished.
The Play button will allow you to listen to your recording
before clicking the Upload button. You must hit the play button first below the SAVE button will belcome active. - You can start over by clicking Record again.
8. Click the SAVE button to submit your recording.
9. Wait until you see that the recording has uploaded successfully, then click the
Save changes button and navigate to the next submission.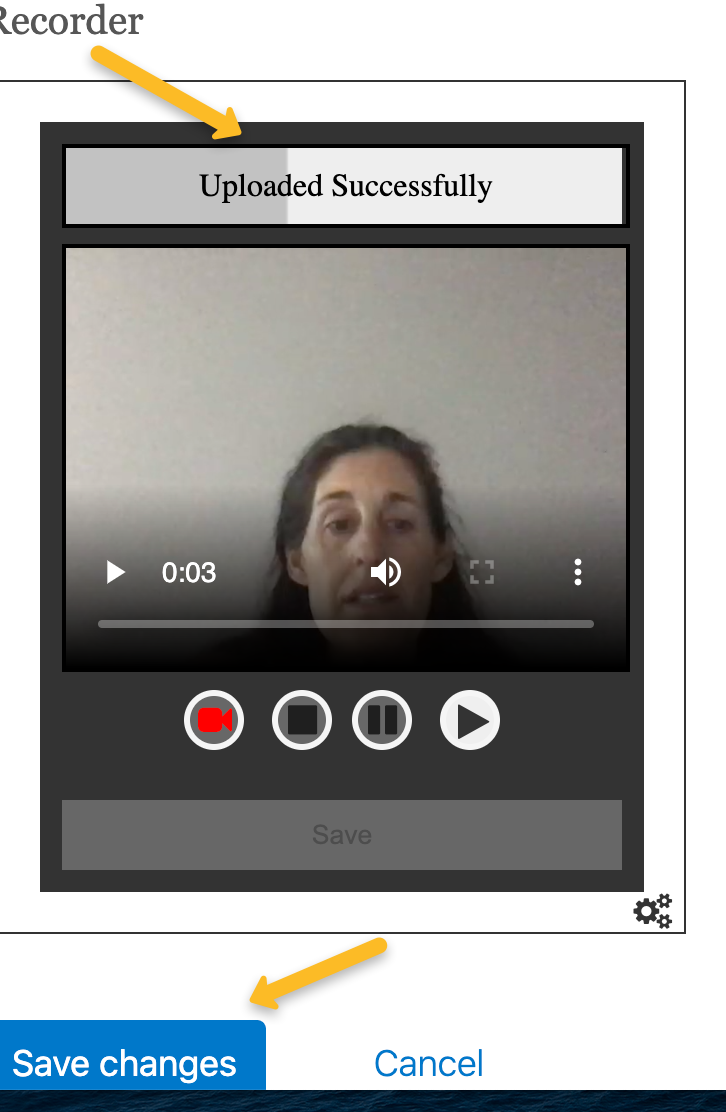
10. After your feedback is uploaded, the feedback recording will display just above
the recorder.
11. Students will be able to see your audio or video feedback video along with their
grade.